Ages: 5-11
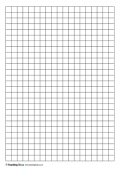
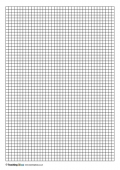
The resources below include two different types of squared paper templates, with different-sized squares.
If you have any requests for other types of paper templates, please get in touch!

The resources below include two different types of squared paper templates, with different-sized squares.
If you have any requests for other types of paper templates, please get in touch!

There are a number of resources which can be used to teach children about speech marks (also known as inverted commas or quotation marks):
1) Witch and Tiger Conversation. This worksheet (in PDF format below) shows ten pictures of a witch and a tiger having a conversation. The speech bubbles are blank, and the procedure for using this worksheet goes as follows:
2) Missing Speech Marks. This activity is also based on a worksheet, which can be also be found below. It contains a number of sentences involving speech. However, the speech marks have been removed from the text and should be replaced by the children.
3) Missing Speech Marks. This activity is very similar to the one above, with children required to put speech marks in the correct place in each of the sentences. The worksheet (in PDF format) is also below.

Four different printable keyboard templates are available below. Can you use these to help your children learn about the keys on the keyboard?
These templates are available with American and UK layouts.
If you have any requests for other types of paper templates, please get in touch!



The printable posters available for download below show famous quotes and inspirational messages. Teachers can use them for display in their classroom to encourage and motivate children in their learning.
Thanks to our wonderful Facebook and Twitter communities for many of these suggestions. If you have any ideas for other quotes that you would like us to turn into a poster, please send me an email!

The following book templates can be used as part of transition activities… at the start of an academic year, at the end, or when children are meeting their new teacher for ‘swap days’. Four different varieties are available, with a range of structures to match the age and ability of your class.
The front / back cover and the inside of the ‘book’ are available. If you print / photocopy them back to back and fold them, they could make an interesting 3D classroom display.
A few months after children have created these books, let children look at them again and see how things have changed!



We recently spent a few days thinking about animation. The children had been making their own stop-motion animations (using I Can Animate and iMovie) with considerable success. We’ve been making these for many years now, and we seem to learn new tricks each and every time we make another. The children were all incredibly enthused by their stop-motion animations, so I wanted to take advantage of this by trying other forms of animation. Here are some of the activities that we did during our ‘Animation Days’:
1) We watched some animations! Over the course of the days, we watched the Wallace and Gromit Cracking Contraptions short films. These are only a few minutes long, but they were great as inspiration for ideas.
2) One of our first practical activities was making thaumatropes. These are incredibly easy to create, requiring only two circles of card and some string. This simple idea was really effective and the children were able to see how the two images could be combined to make an early form of animation. They all made lots of them, and came up with some really creative designs.
3) We then progressed to making Flick Books (also known as flip books). There are some great examples online, and we also shared some flick books which I bought for 99p from The Works many years ago. Again, the children made some fantastic animations. I gave them a template with lots of card rectangles which they then cut and combined to make the book. To make a decent animation in this way, you need lots of frames, so the more rectangles, the better!
4) After making our own individual animations, we then worked as a class to make a giant ‘Art Attack’ style animation. I set up a video camera on my desk (as high up in the air as possible), pointing down to our class carpet area. The children then came up with ideas for things to animate and how to move them to make the animation effective. We had cuddly toys magically walking around our classroom, as well as children animating themselves moving across the area! This process really emphasised the importance of keeping the movements as small as possible in order to create a smooth animation.
5) I then gave the children a chance to use Pivot Stick Animator. We had a few network issues, which restricted our use of the software a little, but the class absolutely loved exploring the program (after minimal instruction from myself), and they came up with some amazing animations which really showed their creativity and dedication to the task. Lots of the children also asked where they could download the software for use at home too.
Here are a few other links / tools which I didn’t use but are also useful for animation:
Have you used any of these sites? Do you have any other ideas for ‘animation-style’ activities to use in the classroom?

Download a free collection of posters featuring high-quality images of the different types of people who help us. The following groups of people are included:
These are available as large posters and smaller cards. Use them on a classroom display board or as part of discussions with your children!
This activity is based on the popular Countdown T.V. programme.
1. Ask children to give four numbers between 1 – 10
2. Ask for a multiple of 10 between 10 -100
3. Ask for a multiple of 25 between 25 – 100
4. Give the children a random(ish) number that they must use the other numbers and the four number operations to find
5. Differentiate by asking low ability to be within 100, mid within 50 and high within 10, of the target number
6. Differentiate by giving each ability group a different number to find (making the lower ability easier).
Chris Siouville has contributed another explanation for this game…
I play ‘countdown’ style games for Maths mental starters. This can also be done as whole class or group work.
First, write a ‘total’ number & conceal it (or write it once the other numbers are selected). Just like the TV programme, children select numbers from a pile of ‘large’ or ‘small’ numbers (a mix of big and small works best). The numbers to put in each pile can be selected according to ability, as can the number of cards chosen for each round (suggested six max).
The selected numbers are displayed, and the children are then given a time limit in which to try to use the selected numbers to reach the total selected by you. They can add the numbers together, multiply etc. They do not have to use every number but cannot use each displayed number more than once. Individuals or teams get (for example) 3 points if they get the exact answer (saying how they worked it out), 2 if they are within 3 of the total etc. I also do a literacy version where children have to make the longest word from letters and anagrams.
A selection of tips and tricks for use during language lessons…
Role Play
Role Playing is an excellent way of encouraging children to use French words in particular contexts. For example, you might set up a shop (e.g. boulangerie) and ask individuals to come into your shop and purchase some items. It might be helpful to show a list of items which you sell (and the French word for each item) on the board so that children can refer to it during their “shopping”. If you do this as a whole-class activity, with individual children entering your shop while the others watch and listen, the whole class will learn (not just the “shopper”). You can also use the shopping context to discuss French money and numbers.
Concentrate on other things… (contributed by Anne Laure Humbert)
A great way to eliminate self-consciousness while learning a foreign language is to make the children concentrate on something else. For instance, revising vocabulary is made so much easier if you throw a ball to the children while you ask a question. Simple but very efficient…
Pictionary… (contributed by Jo)
For introducing vocabulary, as well as the standard flashcards (some made by the children too), I also use a variation of Pictionary – it makes poor drawing skills look deliberate.
Noughts and Crosses… (contributed by Jo)
Flashcards can also be stuck on the board and displayed in a noughts and crosses grid for half the class to play against the other half by choosing the card, saying it in the target language and then replacing it with a nought or cross.
Dominoes… (contributed by Jo)
Instead of simply copying vocabulary and pictures, ask the children to fold an A4 sheet of paper in half lengthways and then two more folds the other way. When unfolded, you should have eight rectangles. Now fill these with the pictures/vocabulary and cut up to play snap, pairs or even dominoes.
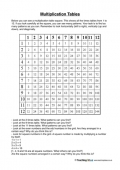
The multiplication square is a good place to look for patterns. There are a number of patterns which children can look for, and doing this will also help to reinforce their knowledge of their multiplication tables.
The worksheet below consists of a picture of the multiplication square which the children can examine. They can also indicate the patterns they have found by colouring the appropriate squares in different colours.
The questions at the bottom of the worksheet focus the children’s attention towards any patterns that they might have missed.
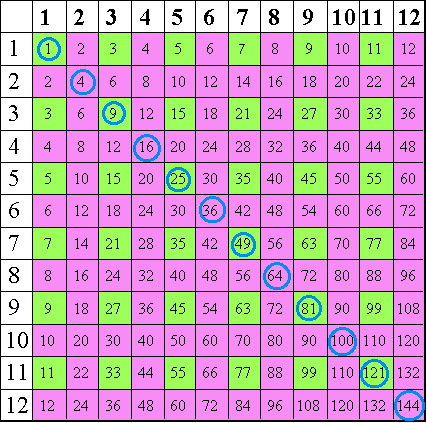
The following picture indicates the situation of even (pink) and odd (green) numbers in the multiplication square:
(Square numbers are indicated by a blue circle).